- SMTP username (usually your email address)
- SMTP password
Ensure you’re using the proper SMTP credentials and server configurations to authenticate your email account and successfully run your campaigns.
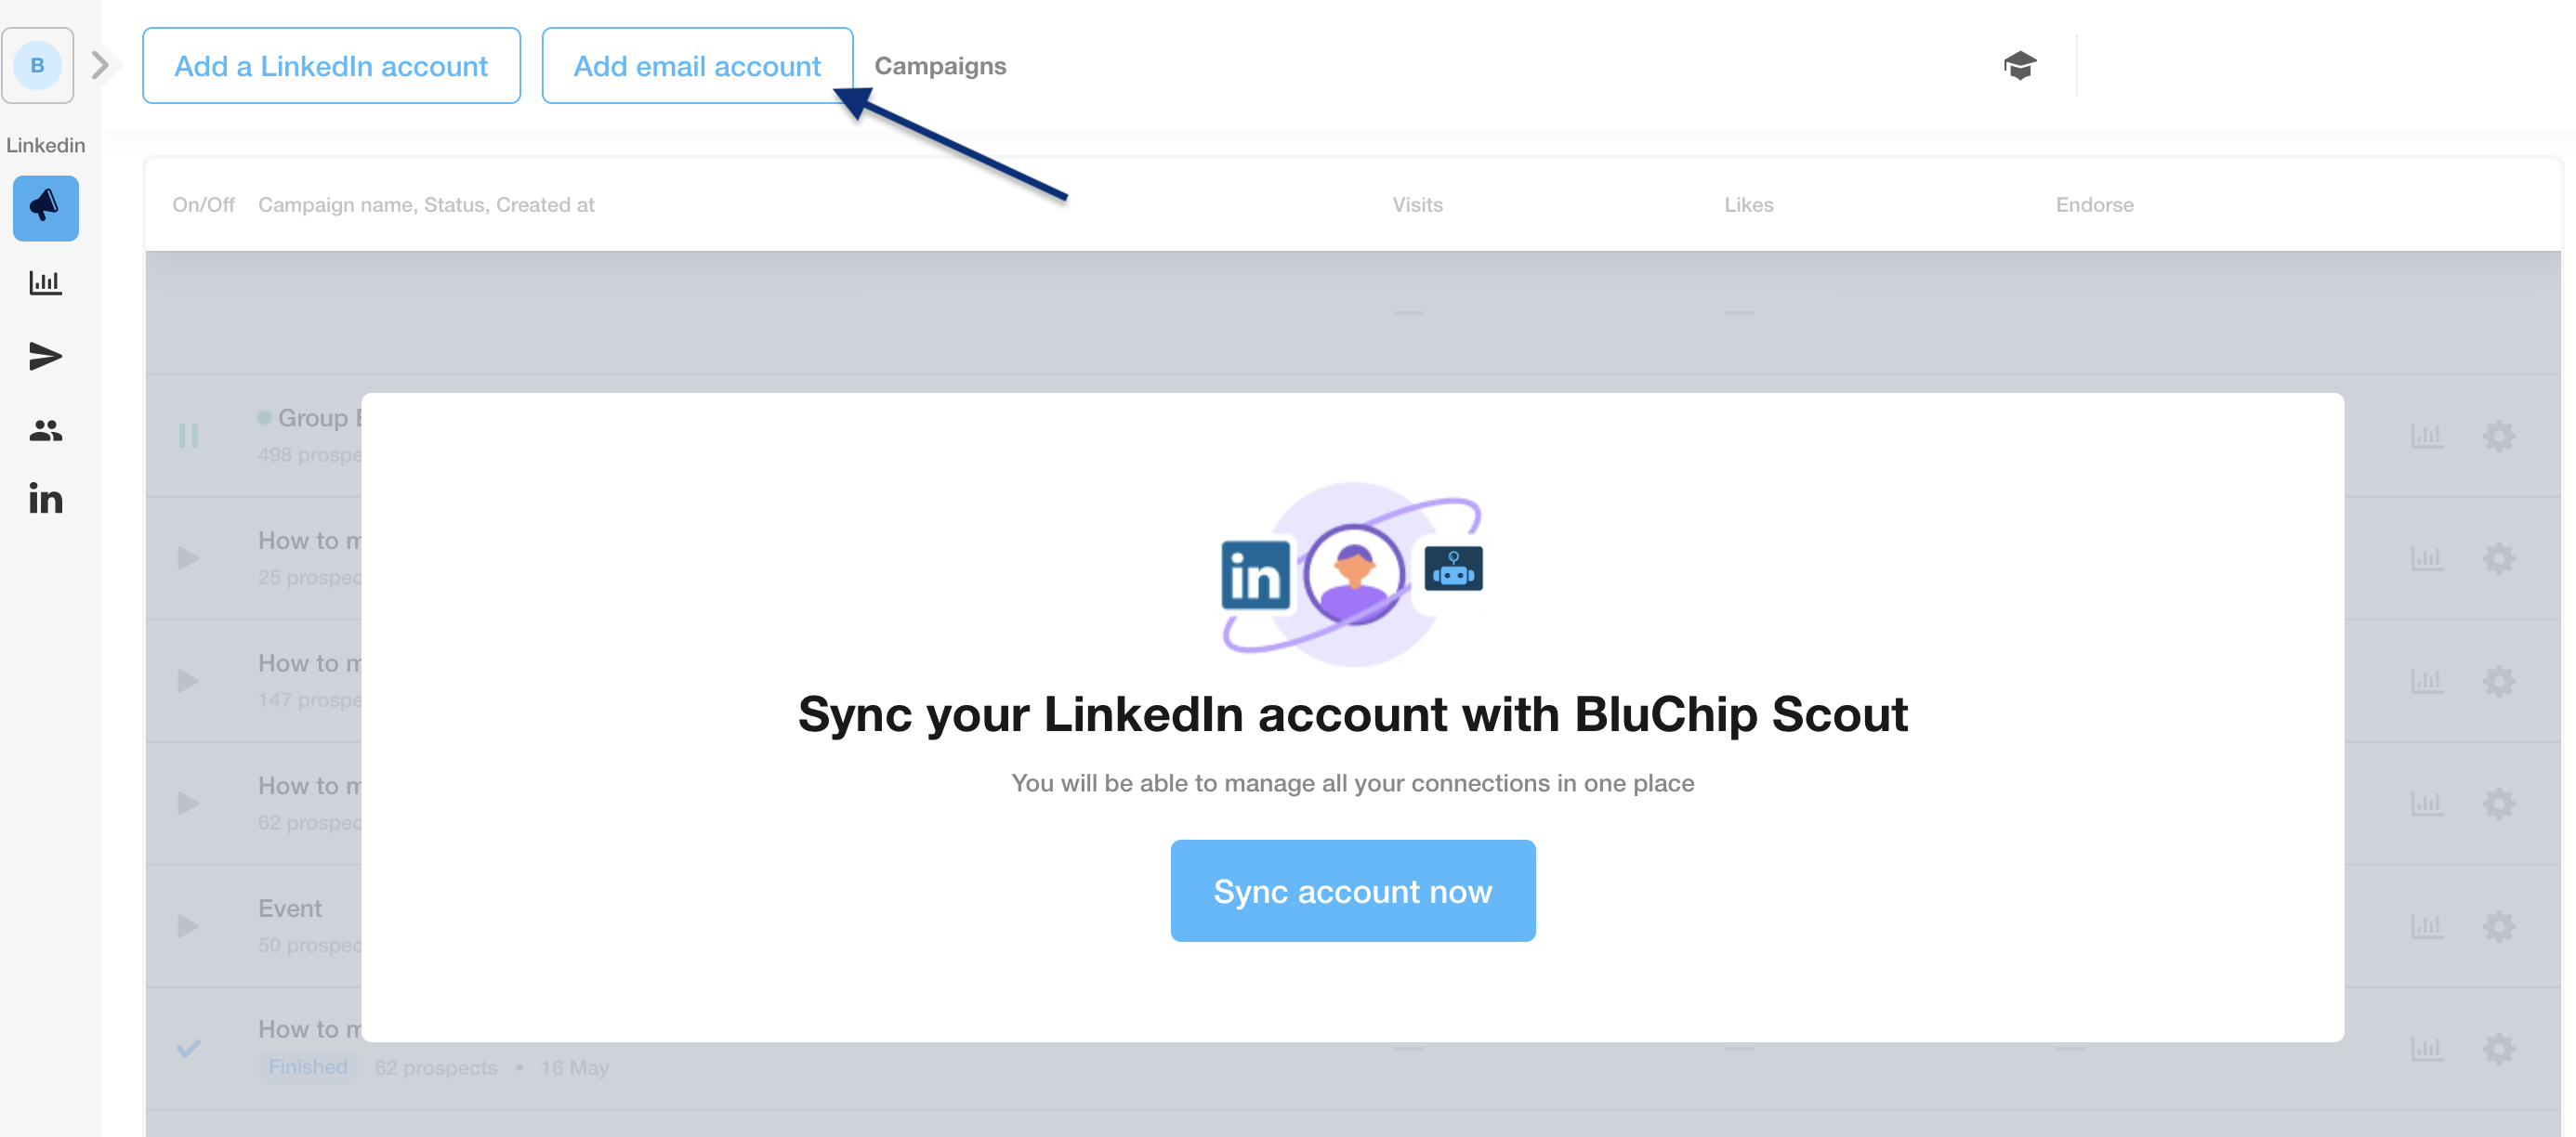
2) Add a new email account
Click the button to add your email account:

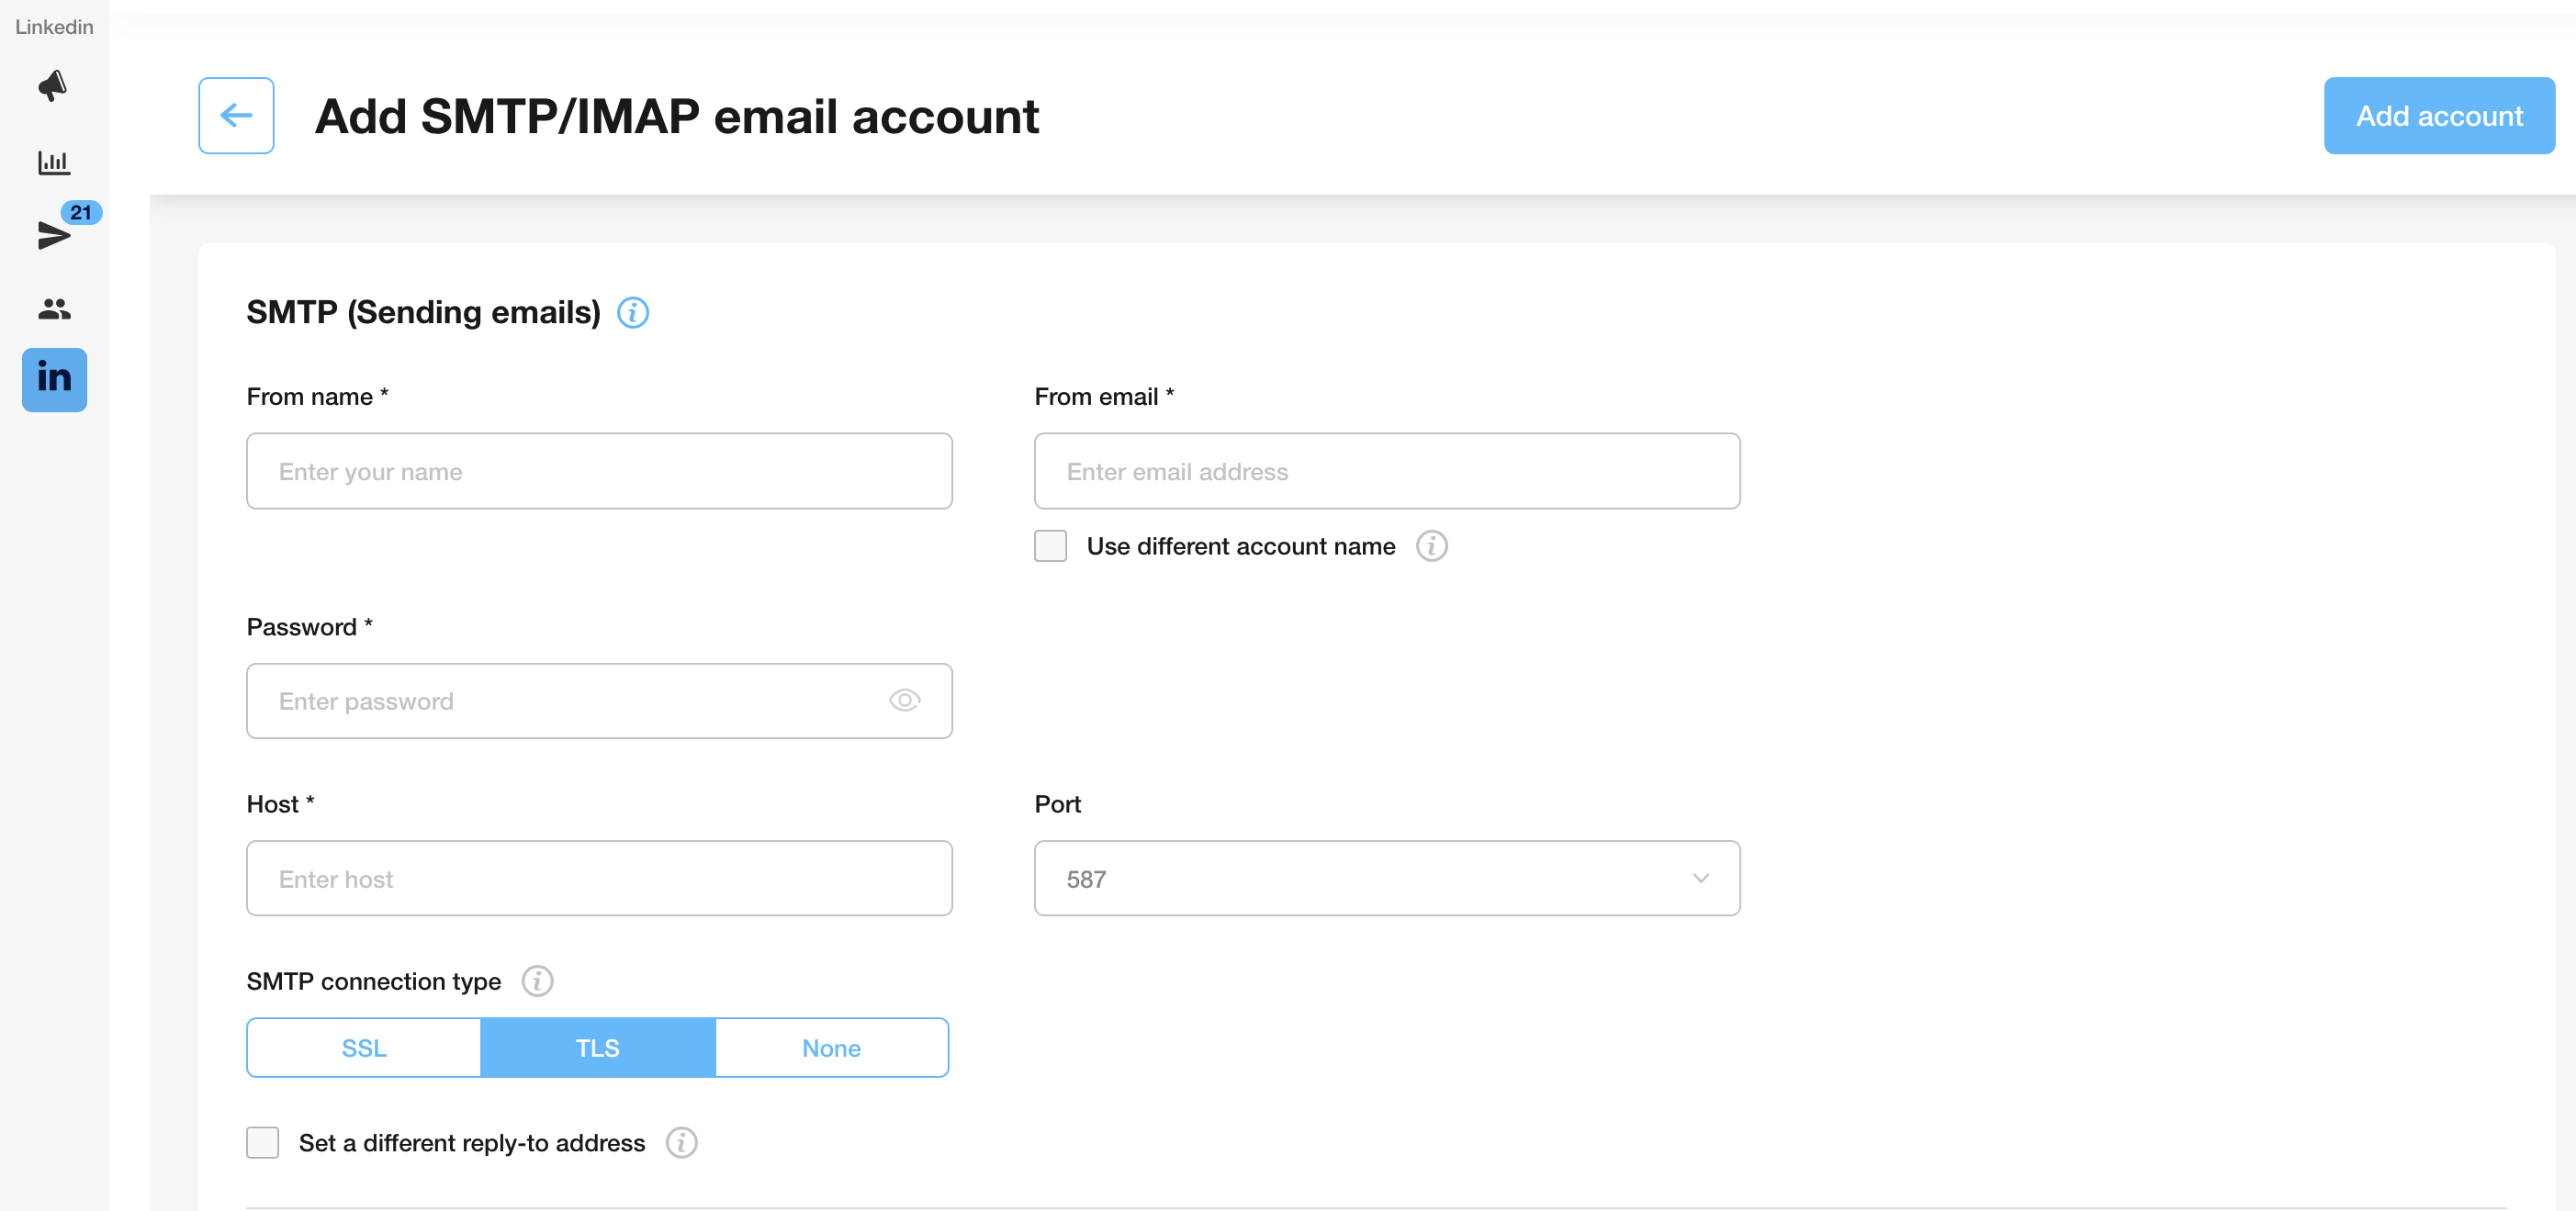
3) Enter your SMTP and IMAP settings
In the SMTP section, enter your SMTP credentials and the server settings for sending emails.

Let’s review each field and what is required:
From name | Enter the name that will appear in the “From” field of your emails. This should be your name. |
From email | Enter the email address you want to send emails from. If you’re sending from an alias, you need to:
Note: The alias must be linked to your main email account. If not, sending may fail. |
Password | Enter your SMTP password. If you use Gmail or Outlook, you may need to use an app password instead of your regular login password. SEE THE VIDEO ABOVE FOR MORE INFORMATION ABOUT GENERATING AN APP PASSWORD. |
Host | Enter your SMTP server address (e.g., smtp.gmail.com, smtp.office365.com)You can find this in your email account settings. |
Port | Port refers to the specific port number used for SMTP/IMAP communications. Common port numbers:
|
SMTP connection type | Select SSL, TLS, or None based on what your email provider recommends. This ensures a secure connection when sending emails. It is usually set up automatically. |
Reply-to email address (optional) | Enable this if you want replies to go to a different email address. Enter the address that should receive the replies. |
How to Set Up an App Password Using Gmail:
Log into your Google Account.
Navigate to the Security tab.
Ensure 2-Step Verification is turned on. If it’s not, follow the prompts to enable it.
Once enabled, click into 2-Step Verification and scroll down to find App Passwords.
Click the arrow next to App Passwords to open the setup.
When prompted to name the app, enter “Scout,” then click Create.
Google will generate a unique password — copy it.
Paste this password into the Password field in your BluChip Scout email setup.
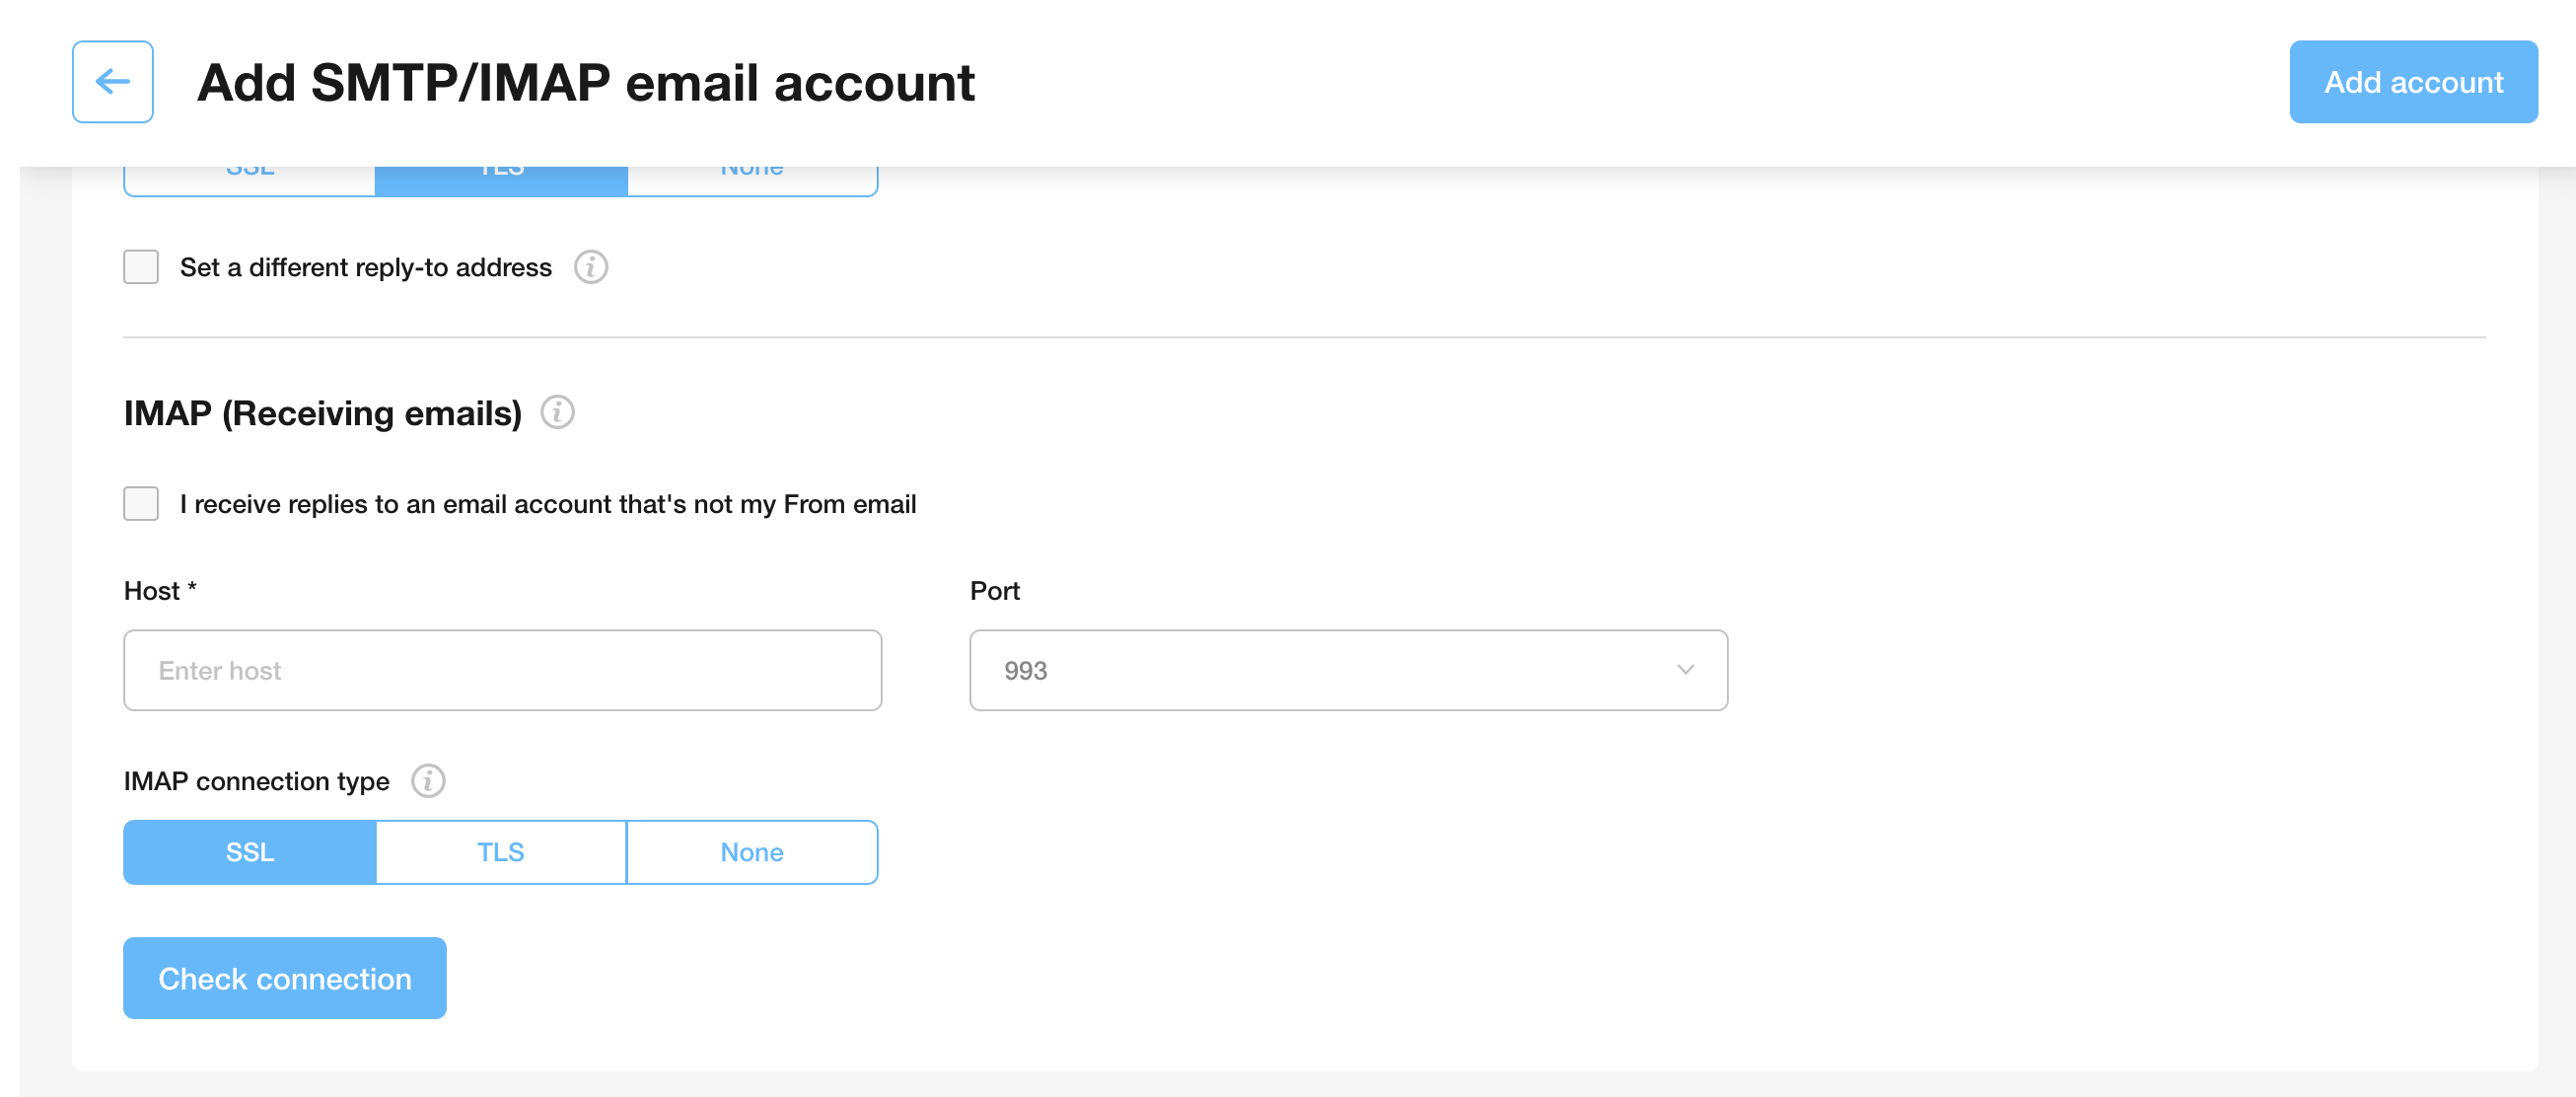
Entering IMAP settings
The IMAP server handles incoming responses and enables Scout to log them in the email campaign statistics. In most cases, your IMAP credentials match your SMTP credentials. Make sure to enter the server name in the Host field under settings.

However, if you would like to connect to another IMAP server, enable the “I receive replies to an email account that’s not my From email” option. You can connect to another mailbox that receives responses by entering IMAP credentials for that email account.
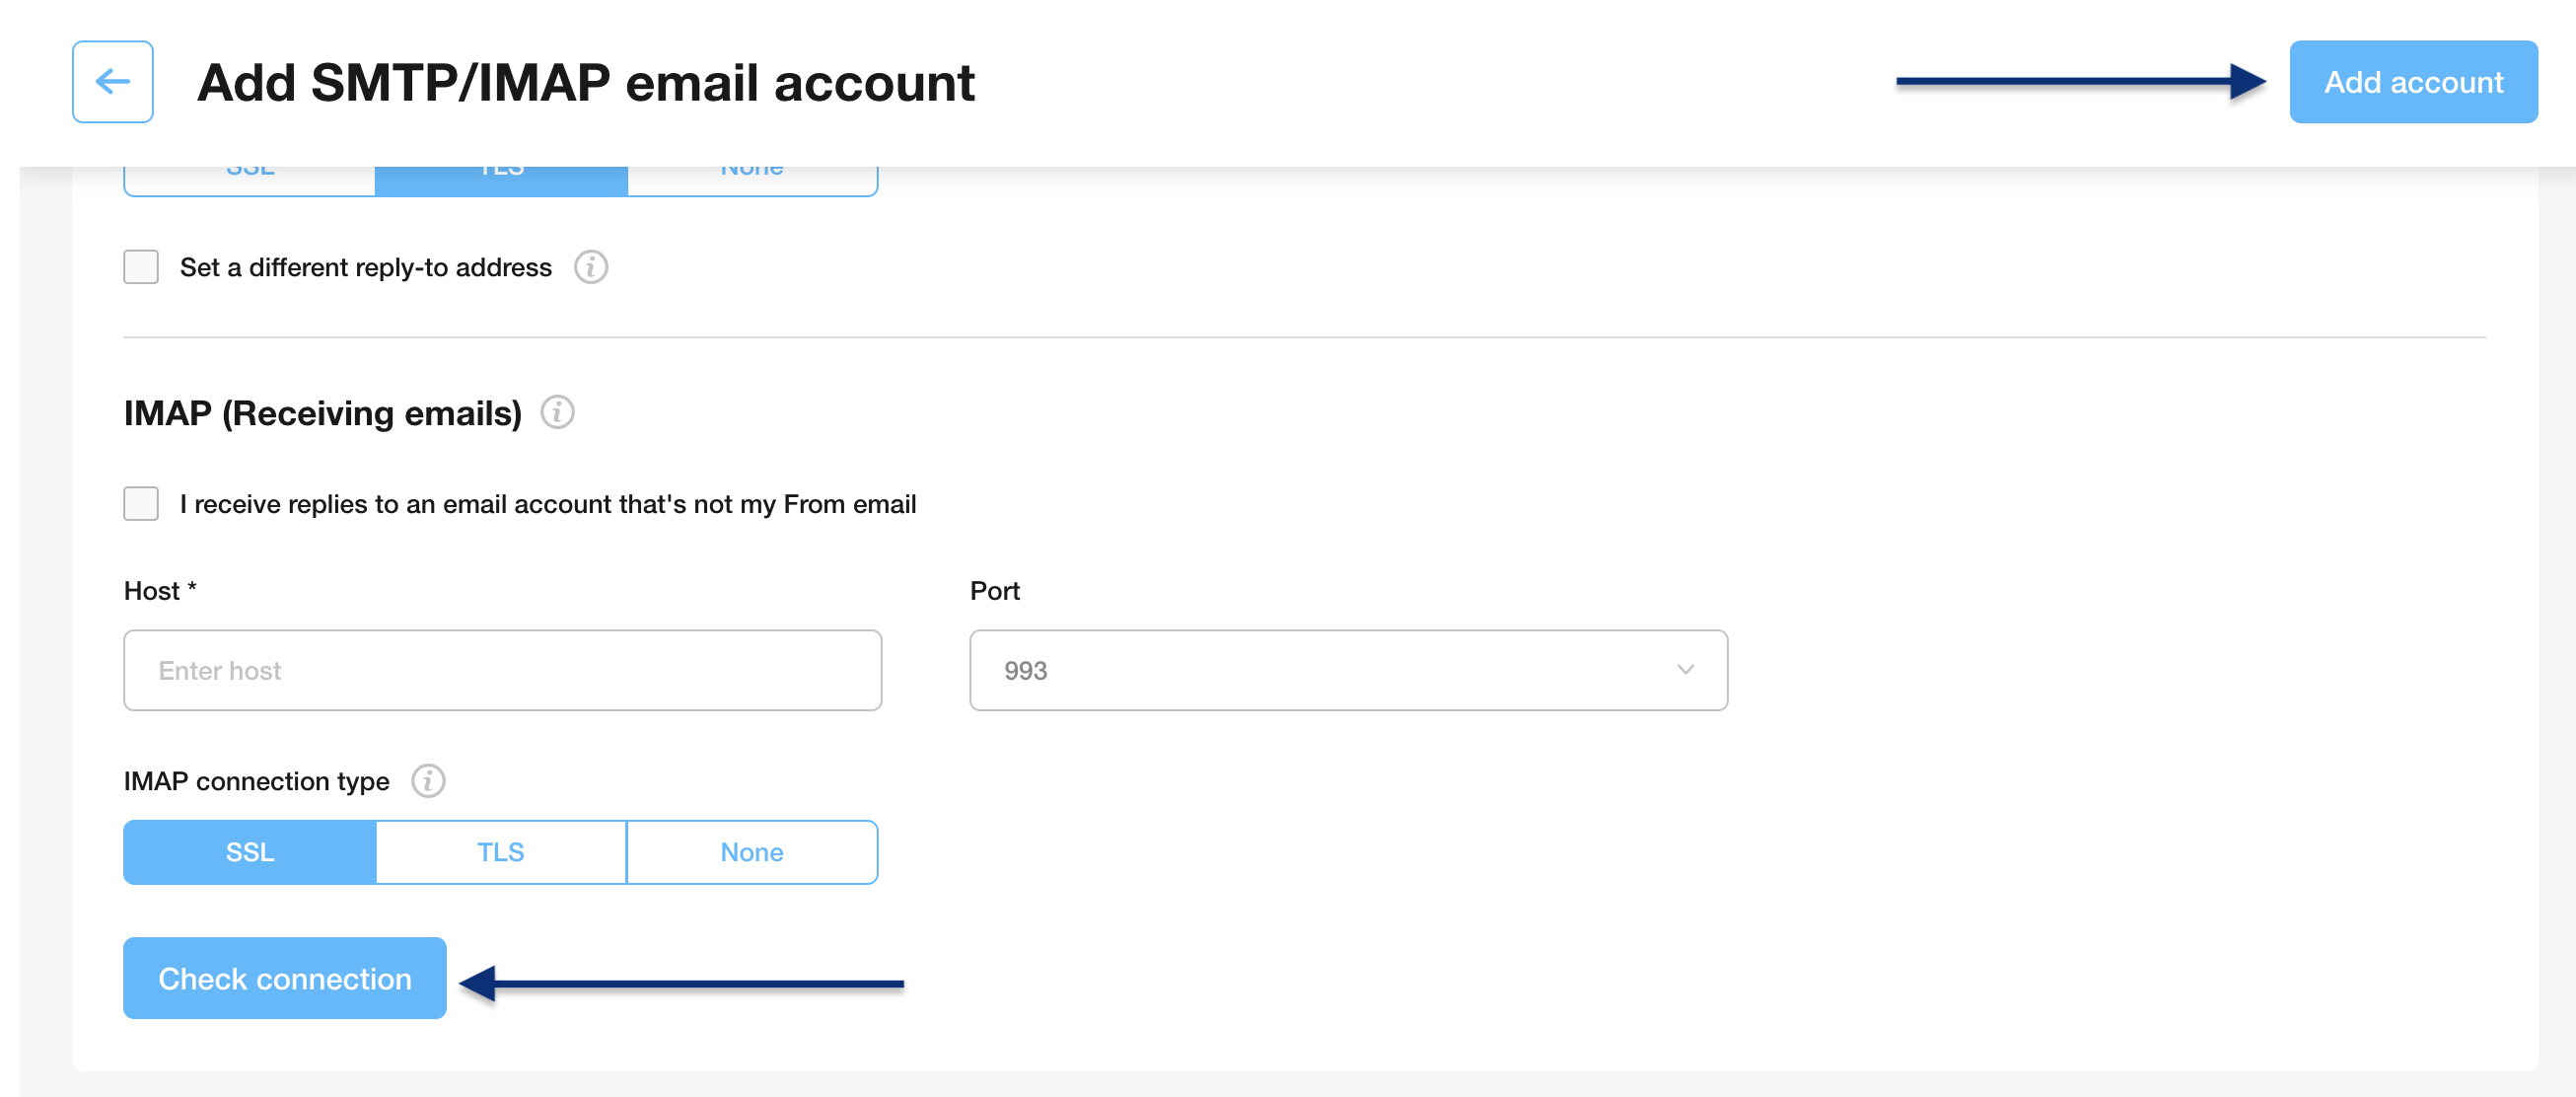
4) Check your connection
Complete your email account setup by testing the connection after completing all of the required fields. Click the “Check connection” button. After the connection is checked, click on the “Add Account” button, and your email account will be successfully added.

